Welcome to your go-to guide on using concrete for pavers in NZ. Whether you’re upgrading your driveway, creating a new patio, or building a garden path, choosing the right concrete can make or break your project. With New Zealand’s mix of weather conditions and terrain, it’s important to understand what kind of concrete works best for your space. This article will walk you through the benefits of concrete pavers, how to choose the right mix, installation tips, and where to buy them locally. If you’re planning a DIY project or just want to make informed choices before hiring a contractor, you’re in the right place.
The best concrete for pavers in NZ is a durable mix suited to local weather, such as standard concrete, exposed aggregate, or coloured concrete. Choose based on the area’s traffic, drainage, and climate. For driveways, reinforced concrete is ideal. For patios and garden paths, standard or decorative options work well.
Table Of Contents
What Are Concrete Pavers?
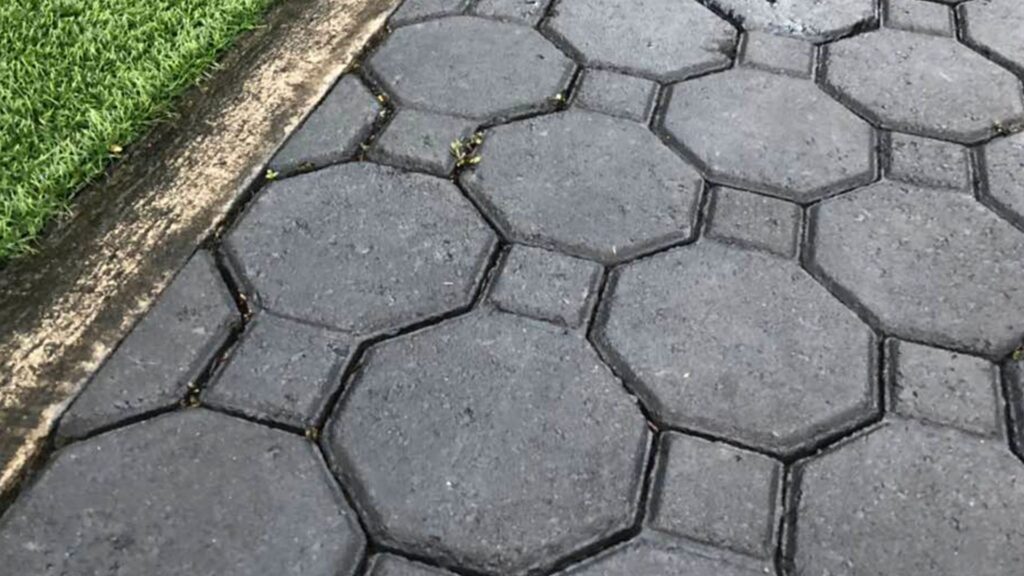
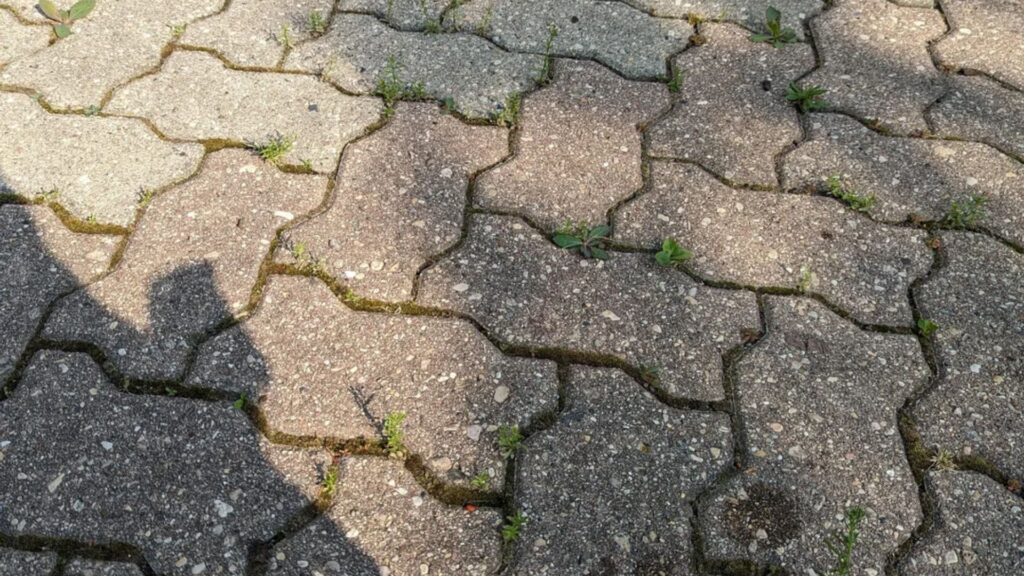
Concrete pavers are individual, pre-formed units made from a concrete mix that’s poured into molds and left to cure. Unlike a single slab of poured concrete, pavers are shaped into uniform blocks or tiles, making them easy to install and replace. They’re commonly used in outdoor spaces where both function and appearance matter, like driveways, patios, walkways, and pool surrounds.
Simple Definition Of Concrete Pavers
Concrete pavers are hard-wearing, flat units created by mixing cement, sand, gravel, and water. These are then shaped using a mold and cured to form solid paving stones. They come in a wide range of sizes, colors, textures, and finishes, making them a versatile choice for landscaping projects. The most common types include interlocking pavers, which fit together tightly, and traditional square or rectangular pavers for a cleaner look.
What sets concrete pavers apart is their strength and adaptability. They’re designed to handle weight and pressure without cracking easily, which is a big advantage in areas like New Zealand, where ground movement or seasonal rain can affect surface stability.
Difference Between Poured Concrete And Concrete Pavers
Poured concrete is laid as a single, continuous slab. It can crack over time, especially if the ground shifts or the surface wasn’t prepped correctly. Repairs often mean cutting out and replacing entire sections. In contrast, concrete pavers are set individually on a prepared base with sand or mortar joints. If one paver cracks, it can be lifted and replaced without disturbing the rest of the surface.
Pavers also allow for better drainage. Because there are small gaps between each unit, water can seep through, reducing pooling and erosion. This feature makes them ideal for outdoor use in New Zealand’s variable climate.
From a visual standpoint, concrete pavers usually offer more design freedom. You can mix colors, patterns, and textures to match your home’s style. Poured concrete can be colored or textured too, but it usually requires more labor and cost to achieve the same effect.
Where People Commonly Use Them (Driveways, Patios, Walkways, Pool Surrounds)
Concrete pavers are popular in many parts of New Zealand thanks to their durability and neat appearance. You’ll often see them used in.
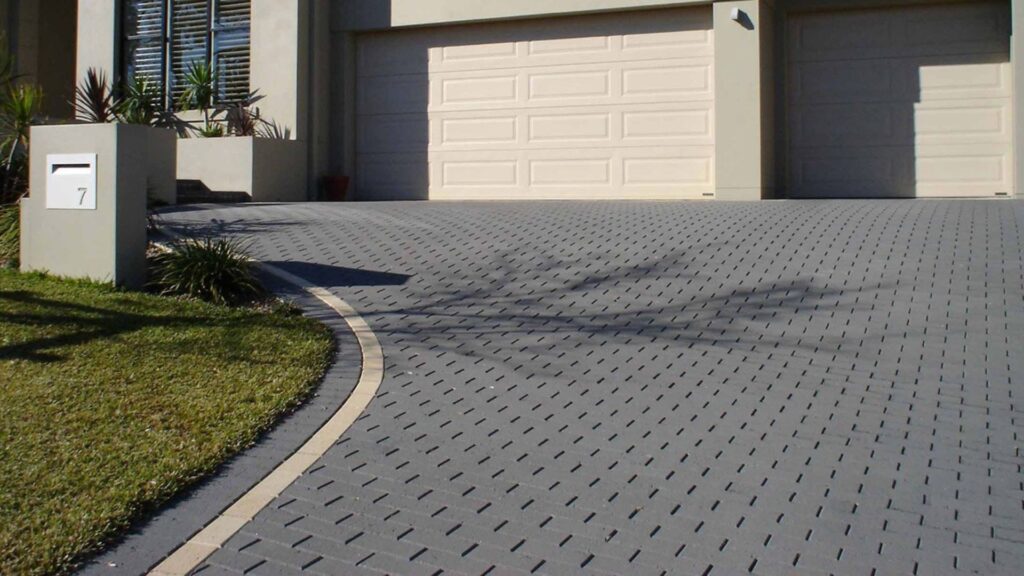
- Driveways: Their strength supports vehicle weight without cracking. They also offer better traction than plain concrete.
- Patios: Homeowners love the custom look of concrete pavers for outdoor lounging or dining areas.
- Walkways: Pavers guide foot traffic and create tidy paths through gardens or side yards.
- Pool Surrounds: Their slip resistance and easy drainage make pavers a safe, practical choice around water.
Many homeowners choose concrete pavers not just for looks, but for peace of mind. When installed correctly, they hold up for decades and require very little upkeep. If you’re planning to update your outdoor space, concrete pavers offer a smart, stylish solution that performs well in any part of NZ.
Why Concrete Is A Popular Choice In NZ
Concrete continues to be one of the top choices for outdoor pavers in New Zealand, and it’s easy to see why. Whether you’re planning a driveway, patio, or garden path, concrete offers the right balance of strength, style, and value. Below, we break down the key reasons why more Kiwis are choosing concrete for their paving projects.
Durability In New Zealand’s Varied Climate
New Zealand’s climate can be unpredictable. Some regions experience heavy rain, while others deal with intense sun, frost, or coastal salt exposure. Concrete handles these conditions better than many other materials. Once it sets and cures properly, it becomes a solid, weather-resistant surface.
Whether it’s the heavy rains in the West Coast or the scorching summers in Canterbury, well-made concrete pavers don’t warp, crack easily, or lose their shape. This durability means less worry about seasonal damage, especially when paired with a good sealer.
Low Maintenance Compared To Other Materials
If you want an outdoor space that looks good without needing constant upkeep, concrete is a smart option. Unlike timber decking that needs regular staining or tiles that can loosen over time, concrete pavers are fairly low maintenance.
A quick sweep and occasional hose-down are usually enough to keep them clean. For added protection, applying a sealer every few years helps prevent stains, moss growth, and water damage, perfect for NZ’s damp winters.
Easy To Customise With Colours, Shapes, And Finishes
Modern concrete isn’t just grey and boring. Today’s concrete pavers come in a wide range of colours, shapes, and textures. You can match the tone of your home, mimic natural stone, or even create a bold design with patterned or stamped concrete.
From charcoal tones for modern spaces to earth colours that blend with gardens, there’s no shortage of choice. This level of customisation gives homeowners control over the look and feel of their outdoor areas, without the high price tag of premium materials.
Affordability Compared To Natural Stone
Cost matters, especially for large projects like driveways or patios. Concrete pavers are much more affordable than natural stone, but still offer a stylish and durable result. You get the appearance of high-end finishes without the steep price.
On average, concrete pavers cost less to buy and install. They’re also easier to replace if one cracks or chips. If you’re on a budget but want a surface that lasts and looks good, concrete delivers strong value.
Choosing concrete pavers in NZ isn’t just a trend, it’s a practical move that balances quality, cost, and style. Whether you’re working with a small backyard or a full-scale outdoor project, concrete gives you flexibility without cutting corners.
Types Of Concrete For Pavers
Choosing the right type of concrete for your pavers is key to getting a strong, durable, and attractive outdoor surface. In New Zealand, where weather conditions can vary from coastal moisture to heavy rainfall and strong sun, your choice of concrete needs to hold up well over time. Below are the most common types of concrete used for pavers, each offering its own benefits depending on where and how you plan to use them.
Standard Concrete Mix
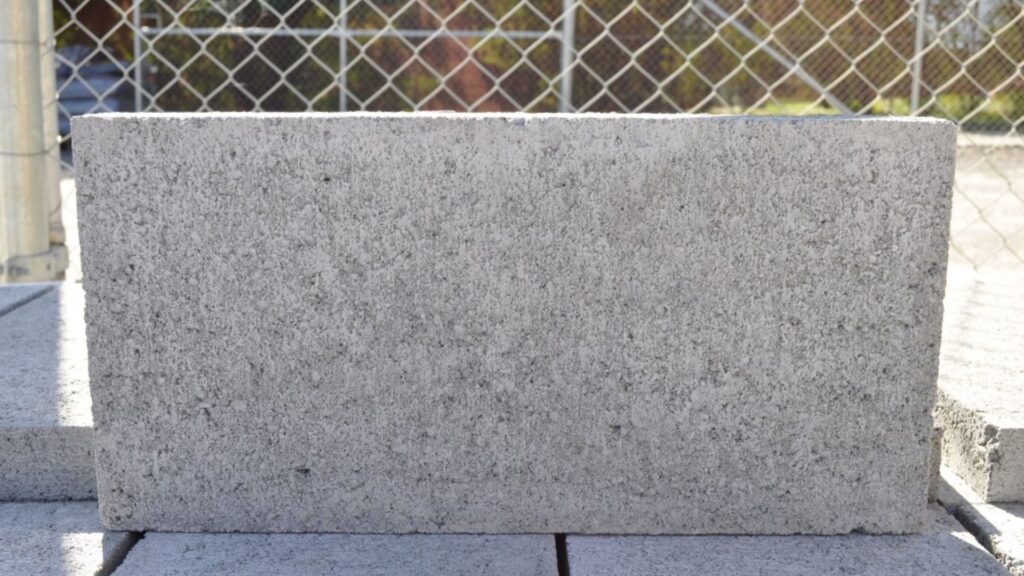
Standard concrete mix is the most common and budget-friendly option for pavers. It consists of cement, sand, gravel, and water in balanced proportions. This type of mix is great for general use around the home, like walkways, patios, or garden paths.
It offers a clean, neutral look and works well if you’re going to place the pavers close together or use them in low-traffic areas. While it doesn’t have any special features, it’s reliable, easy to work with, and widely available from local suppliers across NZ.
Exposed Aggregate
Exposed aggregate concrete is a popular choice in New Zealand for homeowners looking to combine performance with visual appeal. In this type of concrete, the top layer of cement is removed after pouring, revealing decorative stones or pebbles within the mix.
This finish offers a textured surface that’s naturally slip-resistant, making it ideal for pool areas, sloped paths, and driveways. The exposed stones can be sourced in different colours and sizes, allowing you to match them with your landscape design. It’s both functional and stylish.
Coloured Concrete
Coloured concrete is made by adding pigments to the concrete mix before it’s poured. This gives your pavers a consistent colour throughout, not just on the surface. It’s an ideal choice if you want your outdoor space to stand out or match a specific theme or home exterior.
Popular colour options in NZ include charcoal, terracotta, sandstone, and even custom blends. Coloured concrete not only enhances curb appeal but also resists fading if sealed properly. It’s a good option for patios, courtyards, and entranceways where aesthetics matter.
Reinforced Or Fibre-Mix Options For High-Traffic Areas
For driveways, commercial spaces, or any area with heavy foot or vehicle traffic, reinforced or fibre-mix concrete is your best bet. Reinforced concrete uses steel mesh or rebar to strengthen the slab and prevent cracking under pressure. Fibre-mix concrete, on the other hand, blends in synthetic fibres that improve flexibility and reduce shrinkage.
These mixes are engineered for strength and durability. While they may cost a bit more, they’re worth the investment if you want your pavers to last for decades without shifting or breaking, especially in high-load areas like car parks or long driveways.
Each of these concrete types serves a different purpose. Think about how your space will be used, how much weight it needs to support, and the look you’re going for. By choosing the right mix, you’ll get a surface that holds up well in New Zealand’s climate and looks good for years to come.
Choosing The Right Mix For Your Project
When planning to lay concrete pavers, selecting the right concrete mix is one of the most important decisions you’ll make. The wrong choice can lead to cracking, uneven surfaces, or costly repairs. Whether you’re building a driveway, garden path, or patio, you need a mix that suits both the practical and visual needs of your space. Let’s break down the key factors that should guide your decision.
How Weight Load Affects Your Concrete Choice (E.G. Driveway Vs Garden Path)
Not all concrete is made equal. One of the first things to consider is how much weight your concrete pavers will need to support. A concrete mix for a residential driveway needs to be much stronger than the one for a footpath or garden area.
- Driveways: These areas carry heavy loads from cars, trailers, and sometimes boats. Use a concrete mix with a higher compressive strength, usually 25 MPa or more. Reinforced concrete or mixes with added fibers are ideal for these high-pressure zones.
- Garden Paths or Patios: These areas deal with light foot traffic. A standard concrete mix (around 20 MPa) is usually more than enough. You don’t need reinforcement unless you’re dealing with sloping or unstable ground.
Using the right strength mix ensures your surface holds up for years without cracking or sagging.
Weather Exposure (Sun, Rain, Frost)
New Zealand’s weather is unpredictable and varies from region to region. If you’re in a place with high rainfall or frequent frosts, your concrete mix needs to be weather-resistant.
- Rain and Moisture: Choose a mix with low water absorption. Sealed or dense concrete helps prevent water from penetrating the surface, reducing the chance of cracking or moss growth.
- Sun and Heat: In areas with strong sun exposure, coloured concrete may fade over time. Look for UV-resistant additives or seal your pavers regularly to maintain the look.
- Frost: In colder regions, concrete must resist freeze-thaw cycles. A mix with air-entrainment can help absorb expansion during freezing, preventing surface flaking.
Matching your concrete to your local weather will improve both the look and lifespan of your outdoor space.
Drainage And Ground Conditions
Drainage is another critical factor that’s often overlooked. Poor drainage can lead to pooling, erosion, and shifting pavers over time.
- Clay or Soft Soil: These hold water and may cause uneven settling. You’ll need a strong base and potentially a reinforced concrete mix to prevent movement.
- Sandy or Well-Drained Soil: These offer better support. Standard concrete works well here, but always compact the base before pouring or laying.
If your site is on a slope or gets heavy rain, consider a mix that sets faster and drains well. Always allow for a slight gradient in your surface to help water flow away.
Aesthetic Preferences And Surface Texture
Concrete isn’t just about strength, it’s also about style. The type of mix you choose affects the final appearance and feel of your pavers.
- Smooth Finish: Ideal for modern patios or pool areas. Choose a finer mix and ensure proper sealing to avoid slips.
- Exposed Aggregate: Popular for driveways and walkways, this adds visual texture and improves traction. It’s made by removing the top layer to reveal stones or pebbles within the concrete.
- Coloured Concrete: You can choose pre-mixed colour or stain the concrete later. Great for matching home exteriors or creating contrast in a landscape design.
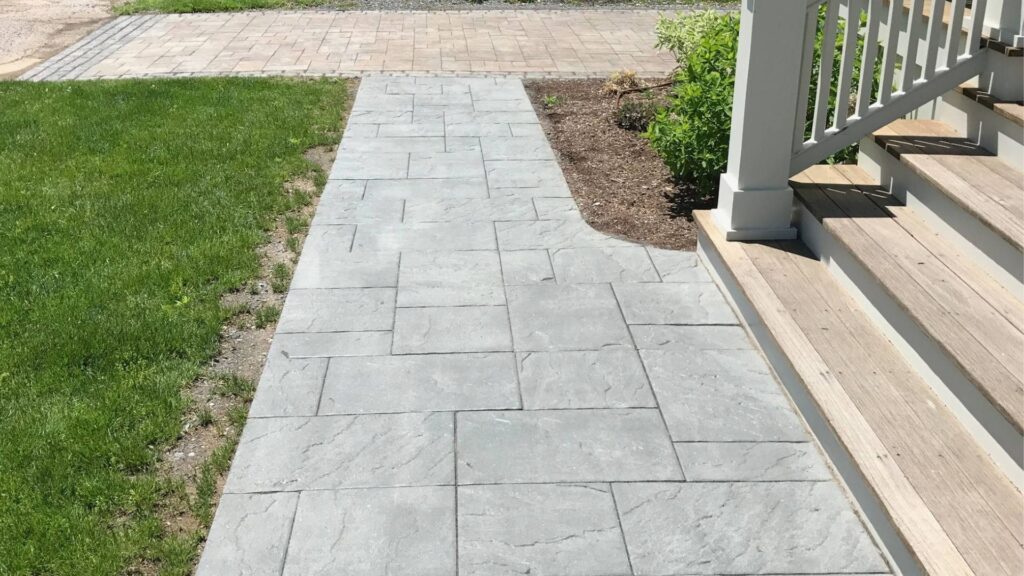
- Stamped Or Textured Surfaces: These mimic the look of stone, brick, or tile. Use a medium to coarse mix for best results and make sure the concrete is firm enough to hold patterns during stamping.
Choosing the right texture and colour helps your project blend with its surroundings and adds value to your property.
Picking the right concrete mix isn’t just a technical step, it’s a design and durability decision. Think about what your surface will handle day-to-day, how your local weather behaves, and what look you’re going for. With the right mix, your concrete pavers will stay strong, safe, and stylish for years to come.
How To Prepare The Base For Concrete Pavers
Getting the base right is one of the most important steps when installing concrete pavers. If the foundation is weak or uneven, the entire surface may shift, crack, or sink over time. Whether you’re building a patio, path, or driveway, proper base preparation ensures the pavers stay in place and last for years. Here’s what you need to know.
Importance Of Site Prep
Before laying any pavers, you need to prepare the ground. Skipping this step often leads to uneven surfaces, drainage issues, or shifting pavers after a few months. A well-prepared site improves load distribution, prevents weed growth, and reduces the risk of water pooling under your pavers.
Proper site prep is also key to managing New Zealand’s unpredictable weather. Rain can quickly expose weak spots or poor drainage, especially in clay or compacted soil zones. Taking time to get the site ready saves you from expensive fixes later.
Steps To Excavate And Level The Ground
Start by marking the area you want to pave using string lines or spray paint. Once marked, follow these steps.
1. Excavate The Area
Dig down to a depth of about 150mm to 250mm, depending on the use. For driveways, you’ll need to go deeper than for garden paths or patios. Make sure the depth accounts for the base layers and the paver thickness.
2. Remove All Organic Material
Clear out grass, roots, and topsoil. These materials can break down over time, causing the surface to sink or shift.
3. Level The Base
Use a rake and a long straightedge to create a flat, even surface. If you’re working on a slope, adjust the angle slightly to direct water runoff away from buildings or sensitive areas.
4. Compact The Soil
Use a plate compactor or hand tamper to press down the soil. This step reduces settling and helps the base stay firm over time.
Laying A Solid Base Layer (Gravel Or Crushed Rock)
The base layer gives your pavers strength and stability. In New Zealand, a typical base uses compacted GAP 20 (gravel aggregate product) or crushed rock.
1. Add The Gravel Layer
Spread about 100mm to 150mm of gravel over the compacted soil. This layer helps with drainage and weight distribution.
2. Compact In Layers
If laying a thick base, compact the gravel in layers. This prevents air pockets and gives the surface a stronger hold.
3. Check The Slope
Make sure there’s a slight slope (1:40) for water runoff. This helps avoid standing water and keeps your pavers dry and safe.
Using Sand For A Smoother Finish And Minor Adjustments
On top of the gravel base, you’ll need a thin layer of sand, often called “bedding sand.” This layer acts as a cushion and allows you to make small adjustments to the height and placement of each paver.
1. Spread The Bedding Sand
Use sharp sand or builder’s sand, not beach sand, which doesn’t compact well. Keep the layer around 20mm to 30mm thick.
2. Screed The Sand Evenly
Use two pieces of pipe and a straight board to level the sand. This step ensures your pavers sit flat and remain even.
3. Avoid Walking On The Screeded Sand
Once the sand is level, avoid stepping on it. Walking disturbs the surface and creates uneven spots that affect the final result.
Taking the time to prepare your base properly will make a big difference in how your pavers perform and look over time. A strong foundation prevents problems and gives you a solid surface you can enjoy for years, whether it’s a driveway, walkway, or backyard retreat.
Concrete Paver Installation Tips
Concrete pavers are a great way to create strong, stylish, and low-maintenance outdoor surfaces. Whether you’re building a driveway, patio, or walkway, installing them correctly is key to getting a result that looks good and lasts. Below is a full breakdown of how to lay concrete pavers, what to avoid, and whether to go the DIY route or hire a professional.
Step-By-Step Breakdown Of Laying Concrete Pavers
1. Plan Your Layout
Start by measuring the area and sketching your layout. Decide on the pattern and direction of the pavers. A simple rectangular layout is easier for beginners.
2. Prepare The Site
Clear the area of grass, soil, or old concrete. Dig down to the required depth, usually around 150mm for patios and up to 250mm for driveways. This allows space for the base, bedding layer, and pavers.
3. Lay The Base Layer
Spread crushed gravel or GAP 40 aggregate evenly across the area. Compact it well using a plate compactor. This layer gives your pavers a solid foundation.
4. Add A Sand Bedding Layer
Spread a thin layer of sharp sand (around 30mm thick). Level it using a screed board to make sure it’s even. Avoid walking on this layer after leveling.
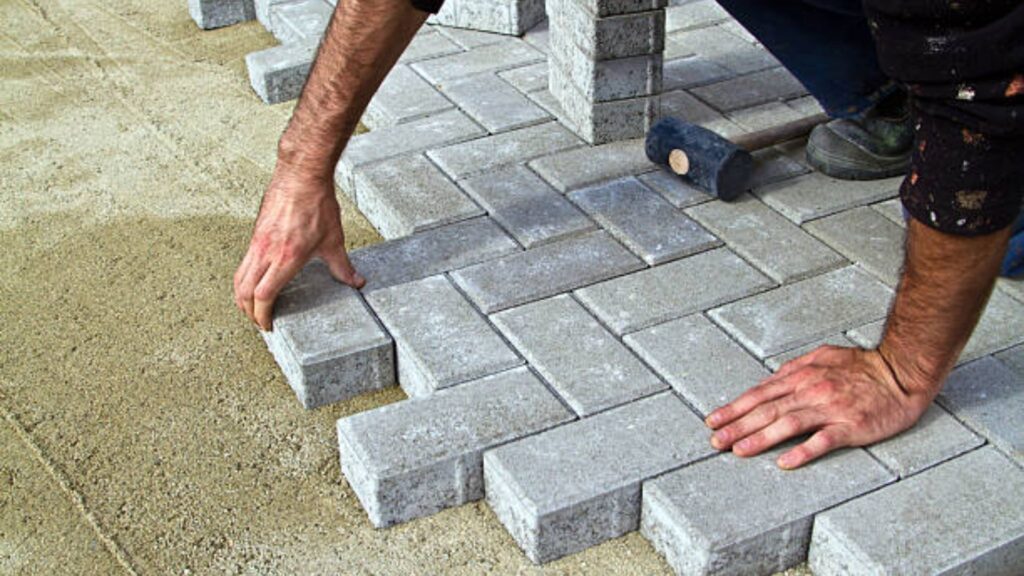
5. Start Laying Pavers
Begin at a straight edge and lay pavers tightly together, keeping consistent spacing. Use a rubber mallet to tap them gently into place. Check alignment and level frequently.
6. Cut Pavers To Fit Edges
Use a masonry saw or angle grinder with a diamond blade to trim pavers at the edges. Always wear safety gear when cutting.
7. Secure The Edges
Install edge restraints or use mortar to hold pavers in place at the borders. This prevents movement over time.
8. Add Joint Sand
Sweep kiln-dried sand into the gaps between the pavers. This locks them in place and helps prevent weed growth.
9. Compact The Surface
Run the plate compactor over the whole surface to settle the pavers and bedding. Add more jointing sand if needed and compact again.
10. Clean And Seal
Brush off excess sand, then hose the area lightly. Allow it to dry for a day or two, then apply a concrete sealer to protect against moisture and stains.
Common Mistakes To Avoid
- Skipping Compaction: Not compacting the base properly leads to sinking and shifting over time.
- Poor Drainage Planning: If water doesn’t drain away, it can damage the surface or base. Always slope the area slightly.
- Incorrect Sand Type: Don’t use beach or soft sand. Use sharp sand for the bedding and kiln-dried sand for joints.
- Uneven Base: A wavy or sloped base leads to an uneven finish. Always level each layer carefully.
- Overusing The Mallet: Too much force can crack the pavers. Tap lightly and evenly.
Tips For DIYers Vs Hiring A Pro
For DIYers
- Start with a small area like a garden path.
- Rent proper tools like a plate compactor and masonry saw.
- Watch tutorials and follow a clear guide.
- Be patient, don’t rush the leveling and measuring steps.
For Larger Projects Or Driveways
- Consider hiring a professional if the area is large, sloped, or will carry heavy loads.
- Contractors have the tools, experience, and crew to finish the job faster and with fewer issues.
- Ask for examples of previous work and check reviews before hiring.
How Long To Wait Before Using The Surface
Once the pavers are laid and compacted.
- Light Foot Traffic: Wait 24 to 48 hours before walking on the surface.
- Heavy Foot Traffic Or Outdoor Furniture: Wait at least 3 days.
- Driveways Or Vehicle Use: Wait 5 to 7 days before parking cars or driving over it.
This gives the joint sand time to settle and the surface to harden properly, especially if you’ve applied sealer. Concrete pavers are a solid investment for your outdoor spaces. By following these tips and avoiding common errors, you’ll get a clean, long-lasting result that stands up to New Zealand’s climate. Whether you tackle it yourself or call in a pro, the key to success is proper prep, patience, and using the right materials.
Cost Of Concrete Pavers In NZ
If you’re planning to install concrete pavers in New Zealand, understanding the cost is key to staying within your budget. While concrete is known for being more affordable than natural stone, several factors can affect your final cost. Let’s break down what you can expect to pay and how different materials compare.
Typical Price Range Per Square Metre
In most parts of New Zealand, the cost of concrete pavers ranges from $40 to $100 per square metre. This price typically includes standard pavers suitable for driveways, patios, or garden paths. Here’s a basic breakdown:
- Standard Concrete Pavers: $40–$70 per m²
- Coloured Or Textured Pavers: $60–$90 per m²
- Exposed Aggregate Or Custom Designs: $80–$100+ per m²
Keep in mind this is just for materials. If you’re hiring a contractor, labour will add more to the total cost.
Cost Comparison: Concrete Pavers Vs Poured Concrete Vs Natural Stone
Choosing between concrete pavers, poured concrete, and natural stone comes down to your goals, aesthetics, and budget. Here’s how they compare.
Concrete Pavers
- Price: Mid-range ($40–$100 per m²)
- Pros: Easy to replace, customisable styles, durable
- Cons: Installation takes time; joint maintenance needed
Poured Concrete
- Price: Lower initial cost ($50–$70 per m², including labour)
- Pros: Smooth finish, quick to install, good for large areas
- Cons: Cracks over time, repairs are harder and more expensive
Natural Stone Pavers
- Price: High-end ($90–$150+ per m²)
- Pros: Elegant look, adds property value, long-lasting
- Cons: Expensive, heavier, limited availability in NZ
Concrete pavers hit the sweet spot for many Kiwis, they offer durability without the premium cost of stone.
What Affects Price (Size, Colour, Custom Designs, Labour)
Several factors influence how much you’ll pay for concrete pavers in New Zealand. It’s not just about the material, it’s about the full picture of your project.
Paver Size And Thickness
Larger or thicker pavers cost more because they use more concrete and take longer to install. Thicker options are better for driveways or heavy traffic areas.
Colour And Finish
Standard grey pavers are cheaper. If you want coloured concrete or special textures like exposed aggregate or honed surfaces, expect to pay extra for the mix and finishing process.
Custom Shapes Or Designs
Want something unique? Custom-cut or decorative patterned pavers come with design and labour fees that can raise your price significantly.
Labour Costs
If you’re not going the DIY route, professional installation adds $50–$100 per m² depending on your location, site prep, and complexity. Jobs on sloped ground or with poor drainage can cost more.
Delivery And Location
If you’re in a remote area or need bulk delivery, freight costs can also increase your total spend.
Whether you’re paving a garden path or an entire driveway, understanding these cost factors helps you make smarter decisions. Compare quotes, ask suppliers about options, and balance cost with long-term value.
Maintenance Tips For Long-Lasting Pavers
Keeping your concrete pavers in top condition doesn’t need to be complicated. With a few simple steps, you can protect your investment, keep your outdoor space looking sharp, and avoid costly repairs. Below are practical maintenance tips tailored for New Zealand conditions to help you get the most life out of your concrete pavers.
Cleaning And Sealing Recommendations
Regular cleaning keeps your pavers looking fresh and prevents dirt buildup. Use a broom or blower to clear debris every week. For deeper cleaning, a hose or low-pressure water blaster works well. Avoid harsh chemicals, stick with mild detergents or specialised paver cleaners available from local NZ hardware stores.
Sealing your pavers adds a protective layer that blocks moisture, oil, and stains. Choose a sealer that suits your paver type, whether it’s matte, gloss, or natural finish. Always apply sealant on a clean, dry surface. Most products require a roller or sprayer and dry within 24 hours.
Sealing should be done shortly after installation and then reapplied every 2 to 3 years. This helps maintain the colour, protects against UV damage, and reduces moss or algae buildup, especially in shaded or damp areas common in many NZ backyards.
How To Deal With Weeds, Stains, And Moss
Weeds often grow between the joints of pavers, especially if sand joints are not properly compacted or sealed. To prevent this.
- Sweep and inspect joints regularly.
- Use polymeric sand that hardens when wet.
- Apply a joint stabiliser or sealant to block weed growth.
If weeds appear, pull them out by hand or use a vinegar and water mix as a natural solution. Avoid using bleach, as it can damage surrounding plants and discolour the pavers.
For stains, act quickly. Oil, food, or rust stains can be removed with paver-safe cleaners or baking soda and warm water. Test any cleaner in a small area first. Moss and algae are common in damp, shaded areas, clean with a diluted vinegar solution or commercial moss remover, then rinse thoroughly.
When To Reseal And Why It Matters
Resealing isn’t just for looks, it protects your pavers from weather, wear, and stains. In New Zealand’s climate, where we see a mix of sun, rain, and frost, resealing becomes even more important.
Reseal your pavers every 2 to 3 years, or sooner if you notice.
- Colour fading
- Water no longer beading on the surface
- Stains soaking into the surface quickly
Before resealing, make sure the pavers are completely clean and dry. Choose a product that suits your region’s weather conditions and the type of finish you want. A well-applied sealer enhances durability and makes ongoing maintenance easier.
By following these care tips, your concrete pavers can stay looking clean, strong, and stylish for decades, no matter the season or setting. Regular attention now means less repair later.
Eco-Friendly Options
Using eco-friendly concrete pavers is becoming more common in New Zealand as more homeowners look for sustainable ways to build outdoor spaces. Whether you’re upgrading your patio or building a new driveway, you can choose materials that not only look good but are also better for the environment. Here’s a closer look at three eco-conscious choices you can consider when selecting concrete for pavers in NZ.
Recycled Concrete Pavers
Recycled concrete pavers are made by crushing old concrete from demolished buildings and reusing it to make new pavers. This process reduces the need for raw materials like sand and gravel, which helps lower environmental impact.
These pavers perform just as well as traditional concrete in most residential projects. They’re durable, affordable, and available in a variety of shapes and sizes. Some suppliers also add small bits of glass or stone to enhance the visual appeal.
If you care about waste reduction and want your project to have a lighter footprint, recycled concrete is a smart option. Plus, you’ll often pay less compared to brand-new materials.
Permeable Pavers To Reduce Stormwater Runoff
Permeable pavers allow water to pass through the surface and soak into the ground, rather than running off into drains. This is a great solution for areas prone to flooding or heavy rain, which is common in many parts of New Zealand.
The gaps between these pavers are usually filled with small stones or gravel that filter water and reduce surface pooling. By using permeable pavers, you help reduce pressure on stormwater systems and protect local waterways from pollution.
They’re especially useful for driveways, walkways, and patios where water tends to collect. Many councils in NZ are now encouraging the use of permeable surfaces in residential areas.
Local Suppliers Focused On Sustainability
Buying from local suppliers who focus on sustainability has both environmental and practical benefits. Local sourcing cuts down on transport emissions and supports New Zealand businesses that care about eco-friendly production methods.
Some concrete companies in NZ are now offering pavers made with lower-carbon cement, alternative binders, or recycled water. Others go a step further by operating low-waste manufacturing processes or offering take-back programs for unused materials.
When choosing a supplier, ask about.
- The origin of their raw materials
- Their environmental certifications
- Whether they offer recycled or permeable products
By supporting local and green-minded businesses, you reduce your carbon footprint and help grow the market for sustainable building materials.
Eco-friendly concrete pavers in NZ are no longer a niche option, they’re practical, stylish, and accessible. Whether you’re using recycled materials, managing rainwater with permeable designs, or sourcing from responsible suppliers, you’re making a smart choice for both your home and the environment.
Where To Buy Concrete Pavers In NZ
Choosing the right supplier is just as important as picking the right type of concrete. A good supplier helps you get quality pavers that last, offers advice suited to your project, and backs up their product with service and support. Whether you’re planning a backyard patio or a full driveway, here’s what you need to know about buying concrete pavers in New Zealand.
Top Suppliers And Brands Known In New Zealand
New Zealand has several reliable and trusted names in the concrete paver space. These companies have been around for years and are known for providing high-quality materials and excellent customer support.
Firth Concrete
One of the most recognized brands in NZ, Firth offers a wide range of concrete paving options including standard, architectural, and permeable pavers. They also supply matching retaining walls and edging systems.
Premier Pavers
Premier Pavers focuses on style and variety. They’re known for coloured pavers, custom sizes, and modern designs that suit both commercial and residential use.
Mitre 10 And Bunnings Warehouse
If you prefer to see products in person, both of these national hardware chains carry a solid selection of ready-made concrete pavers. They also often have competitive pricing and in-store advice.
Urban Paving
Based in Christchurch, Urban Paving offers both concrete and natural stone pavers. They’re known for custom finishes and tailored orders, which can be useful if you’re working with a unique design.
Paving Slab Co.
A smaller supplier that’s well-reviewed for its customer service and attention to detail. Great for homeowners who want something different or made to order.
What To Ask Before Buying (Warranty, Delivery, Returns)
Before you order, it pays to ask a few key questions. Not all suppliers offer the same support, and knowing the terms upfront can save you money and stress later.
Do They Offer A Product Warranty?
Good suppliers should guarantee their pavers against cracking, fading, or poor manufacturing for a set period.
What Are The Delivery Options And Costs?
Ask if delivery is included, how long it takes, and whether they can unload near your installation area. Some charge extra based on distance or accessibility.
What Is Their Return Policy?
If you over-order or the product isn’t right, can you return unused pavers? Find out how returns are handled and if there are restocking fees.
Do They Offer Installation Advice Or Services?
Some companies provide guides, templates, or referrals to trusted contractors. This is helpful if you’re doing the job yourself.
Pros And Cons Of Local Vs Online Orders
Buying locally or online each has its benefits, and a few drawbacks. Your choice might depend on your location, project size, and timeline.
Local Suppliers (In-Store Or Local Depots)
Pros
- You can see and feel the product before buying
- Easier communication with staff for advice or follow-up
- Faster delivery and better handling of returns
Cons
- Limited stock or selection depending on the store
- Might need to arrange your own transport if delivery isn’t included
Online Orders (E-commerce Stores Or Direct From Manufacturer)
Pros
- Wide selection of colours, finishes, and custom sizes
- Often better bulk pricing or promotional offers
- Easy to compare options across brands
Cons
- Delivery can take longer, especially to rural areas
- Higher risk of damage during shipping
- Harder to resolve issues if you’re dealing with an overseas supplier
When buying concrete pavers in NZ, don’t rush. Take time to compare suppliers, ask questions, and consider both local and online options. A smart buying decision gives your project a strong start and saves you money in the long run.
We supply top-grade concrete tailored for paver installations across driveways, patios, walkways, and outdoor spaces. Our concrete mix offers the strength and consistency you need for long-lasting, low-maintenance surfaces, no matter your project size. Click here to connect with our team. Let’s get your paver project moving today.
FAQs: About Concrete For Pavers In NZ
What type of concrete is best for pavers in New Zealand?
Standard concrete works well for most residential projects. For driveways or high-traffic areas, use reinforced concrete. Exposed aggregate and coloured concrete are good for decorative outdoor spaces.
Are concrete pavers better than poured concrete?
Concrete pavers offer more flexibility and are easier to repair. If a single paver cracks, you can replace it. Poured concrete is harder to fix and can be more expensive if it needs replacing.
Can I lay concrete pavers myself?
Yes, DIY installation is possible if you follow proper steps. Prepare the base well, use the right sand layer, and lay each paver evenly. If unsure, consider hiring a professional for driveways or sloped areas.
How much do concrete pavers cost in NZ?
Prices vary from $40 to $100 per square metre depending on style, thickness, and supplier. Custom colours or finishes may cost more.
Do I need to seal concrete pavers?
Sealing isn’t required but is highly recommended. It helps protect against stains, moisture, and wear from NZ’s climate. Reapply every 2–3 years for best results.
How long do concrete pavers last?
Concrete pavers can last 25 to 50 years with proper installation and maintenance. Regular cleaning and sealing can extend their lifespan.
Are concrete pavers slippery when wet?
They can be polished or smooth. Choose textured or exposed aggregate finishes for better slip resistance, especially around pools or in shaded areas.
What’s the best base for laying concrete pavers?
Use compacted gravel or crushed rock as the base, followed by a layer of sand. This combination helps with drainage and keeps the pavers level.
Can I use concrete pavers for driveways in NZ?
Yes, but make sure the pavers are thick enough (usually 50–60mm) and the base is well compacted. Reinforced concrete pavers or interlocking types are ideal.
Where can I buy quality concrete pavers in NZ?
Look for local suppliers like Firth, Premier Pavers, or Mitre 10. Always ask about delivery options, warranties, and whether they offer sealing products.
Conclusion
Concrete pavers are a smart choice for New Zealand homeowners who want a durable, stylish, and cost-effective solution for their outdoor spaces. Whether you’re building a driveway, patio, or garden path, the right concrete mix makes all the difference in how long your project lasts and how good it looks. Standard concrete is reliable, exposed aggregate adds texture, and coloured options let you match your landscape design. But great results start with careful planning, know your surface needs, prepare the base well, and choose materials suited to NZ’s weather. Take the time to compare options, get quotes, and ask suppliers the right questions. If you’re not sure where to begin, download our free paver planning checklist to make the process simple and stress-free.